skip to Main Content
Mon - Sat: 8:00 AM - 5:00 PM info@billydecksandpatiosllc.com
Porch Installations

How Porch Installations Can Enhance Your Home’s Curb Appeal: A Step-by-Step Process

A well-designed porch can do more than add outdoor living space—it can completely transform the look and feel of your home. Whether you’re planning to sell or just want to boost your home’s aesthetic charm, installing a new porch is one of the most effective ways to enhance curb appeal. Here’s a step-by-step guide on how professional porch installations elevate your home’s value and beauty.


🏡 Step 1: Assess Your Home’s Style and Space

Before the first nail is hammered, it’s important to evaluate your home’s architecture and available space. Is your home traditional, modern, or rustic? The porch design should match your home’s aesthetic while maximizing usable space.


✏️ Step 2: Design Planning and Customization

Next comes the fun part—design! Homeowners work with contractors to choose features like:

  • Covered or open layout

  • Wood, composite, or concrete materials

  • Decorative railings, columns, or lighting

  • Seating areas, steps, and landscaping tie-ins

This phase ensures the porch fits your vision while staying within budget and code compliance.


🧰 Step 3: Permits and Preparation

Professional porch installers will handle local permits and inspections to make sure the project meets safety and zoning regulations. They’ll also prep the site, which may include grading, clearing, and establishing a foundation.


🔨 Step 4: Construction Begins

Once approvals are in place, the building process starts. A typical installation includes:

  • Foundation or footings

  • Framing and flooring

  • Railings and columns

  • Roofing (if covered)

  • Final finishing (paint, stain, trim)

Skilled contractors ensure every detail is done to code and to your expectations.


🌿 Step 5: Finishing Touches and Landscaping

To truly boost curb appeal, the new porch should seamlessly blend into your front yard. That may involve:

  • Lighting for safety and ambiance

  • Flower beds or planters

  • Walkways and edging

  • Porch swings or furniture

These finishing touches turn the structure into a warm and inviting entryway.


💡

A professionally installed porch isn’t just an exterior upgrade—it’s an investment in your home’s value, functionality, and curb appeal. From the first design sketch to the final coat of paint, every step of the process helps create a welcoming space that leaves a lasting impression.

Read more
porch

Porch Installations Made Easy: A Step-by-Step Guide for Homeowners

A porch is more than just an entryway to your home. It’s an extension of your living space, offering a place to relax, entertain, and enjoy the outdoors. Whether you’re looking to add a small front porch, a grand wraparound design, or simply update your existing structure, the process doesn’t have to be overwhelming. With the right approach, porch installations can be simple, efficient, and rewarding.

Here’s a step-by-step guide to help homeowners navigate the porch installation process.

Planning and Design

The first step in any successful porch installation is planning. A well-thought-out design ensures that the porch not only complements the aesthetics of your home but also serves its intended purpose. Here are a few things to consider:

  • Purpose of the Porch: Determine how you plan to use your porch. Is it a place to sit and relax, a space for entertaining, or just an entryway to the house? This will influence its size and layout.

  • Style and Materials: Decide whether you want a traditional, modern, or rustic look. Materials commonly used for porch construction include wood, vinyl, composite, and aluminum. Each has its pros and cons, so choose one that suits your budget, maintenance preferences, and climate.

  • Building Codes and Permits: Check with your local building authority to determine if you need a permit. Many areas have codes regarding porch construction, especially for weight-bearing structures, electrical work, and the materials you use.

  • Size and Location: Ensure the porch fits well with your home’s dimensions. You’ll also want to think about the location — make sure the porch has adequate clearance for traffic and won’t interfere with landscaping or utilities.

Gathering Materials

Once your design is in place, it’s time to gather all the necessary materials. Depending on the type of porch you are building, your material list will vary, but generally, you’ll need:

  • Framing materials: Pressure-treated wood for posts, beams, and supports.

  • Decking materials: Wood planks, composite, or other decking materials.

  • Concrete: For anchoring posts and creating a sturdy foundation.

  • Railing and posts: For safety and aesthetic appeal.

  • Tools: Hammer, saw, drill, level, tape measure, shovel, etc.

Buying all your materials at once will ensure that you have everything needed for the entire project. It can also help you avoid delays.

Preparing the Site

Before you start building, you need to properly prepare the site. Follow these essential steps:

  • Clear the Area: Remove any debris, plants, or objects that could obstruct the construction process.

  • Level the Ground: Make sure the area where the porch will be built is level. This may require some digging or filling in low spots with soil. A flat surface will ensure your porch is stable and properly aligned.

  • Mark the Layout: Use stakes and string to mark the outline of the porch. This will help you visualize the space and ensure the dimensions are correct before beginning the build.

Building the Foundation

The foundation is critical to the stability and longevity of your porch. There are a few foundation options, depending on the size of your porch:

  • Concrete Slab: Ideal for smaller porches, a concrete slab provides a solid base. You’ll need to dig trenches, pour concrete, and wait for it to cure.

  • Concrete Footings: For larger or elevated porches, concrete footings can be poured into the ground to support the structure. These footings should be placed at least 12 inches below the frost line to prevent shifting in colder climates.

  • Pier and Beam: This foundation style involves setting posts into the ground, which are then connected to beams. It’s a great option for uneven terrain or if you want a raised porch.

Constructing the Frame

Once your foundation is set, it’s time to build the frame. This is the skeleton of your porch and supports everything else, so accuracy is key.

  • Install Posts: Start by placing the support posts into the concrete footings or piers. Use a level to ensure they are straight and properly aligned.

  • Attach Beams and Joists: Once the posts are in place, install the horizontal beams and attach the joists to the beams to form a sturdy platform. Ensure everything is level and square before securing with nails or screws.

Installing the Decking

With the frame in place, it’s time to add the decking material. If you’re using wood, be sure to treat it to protect against the elements.

  • Lay the Deck Boards: Start from one side and work your way across, leaving small gaps between the boards for drainage. Use a saw to trim any edges that extend beyond the frame.

  • Secure the Boards: Fasten the boards to the joists with screws or nails. Screws are generally better for ensuring a tight fit and durability.

Adding Railings and Stairs

For safety, many porch designs will require railings and stairs. The process is similar to the main frame construction.

  • Install Posts for Railings: Secure posts around the perimeter of the porch where railings will be attached.

  • Attach Rails and Balusters: For a traditional look, use wooden rails and balusters. You can also opt for vinyl or metal railings, which require less maintenance.

  • Build Stairs: If your porch is raised, you’ll need stairs for easy access. Make sure the stairs are wide enough and built to code, with non-slip treads.

Finishing Touches

Once the basic structure of your porch is completed, it’s time to add finishing touches that enhance the look and functionality:

  • Paint or Stain: Protect the wood by applying a coat of paint or stain. This will help preserve the material and keep the porch looking fresh for years.

  • Lighting: Add outdoor lighting to illuminate your porch. Wall sconces, hanging lights, or LED strip lights can all enhance the ambiance.

  • Furniture and Decor: Finally, decorate your porch with furniture, cushions, and plants. A comfortable seating area with throw pillows, outdoor rugs, and some hanging plants can turn your porch into a cozy retreat.

Final Inspection

Once everything is complete, it’s a good idea to inspect your work. Ensure all railings and stairs are securely attached and that no nails or screws are protruding. Also, check that the porch is level, stable, and safe to use.

Building a porch is a rewarding project that adds both beauty and function to your home. By following these steps and carefully considering your design, materials, and foundation, you can successfully complete the project on your own. However, if the project feels overwhelming or you run into any challenges, don’t hesitate to consult a professional for assistance.

In the end, whether you’re sipping your morning coffee or hosting friends for an evening gathering, your new porch will be the perfect place to enjoy the outdoors in style. Happy building!

Read more

Porch Installations: How to Create a Cozy Outdoor Space for All Seasons

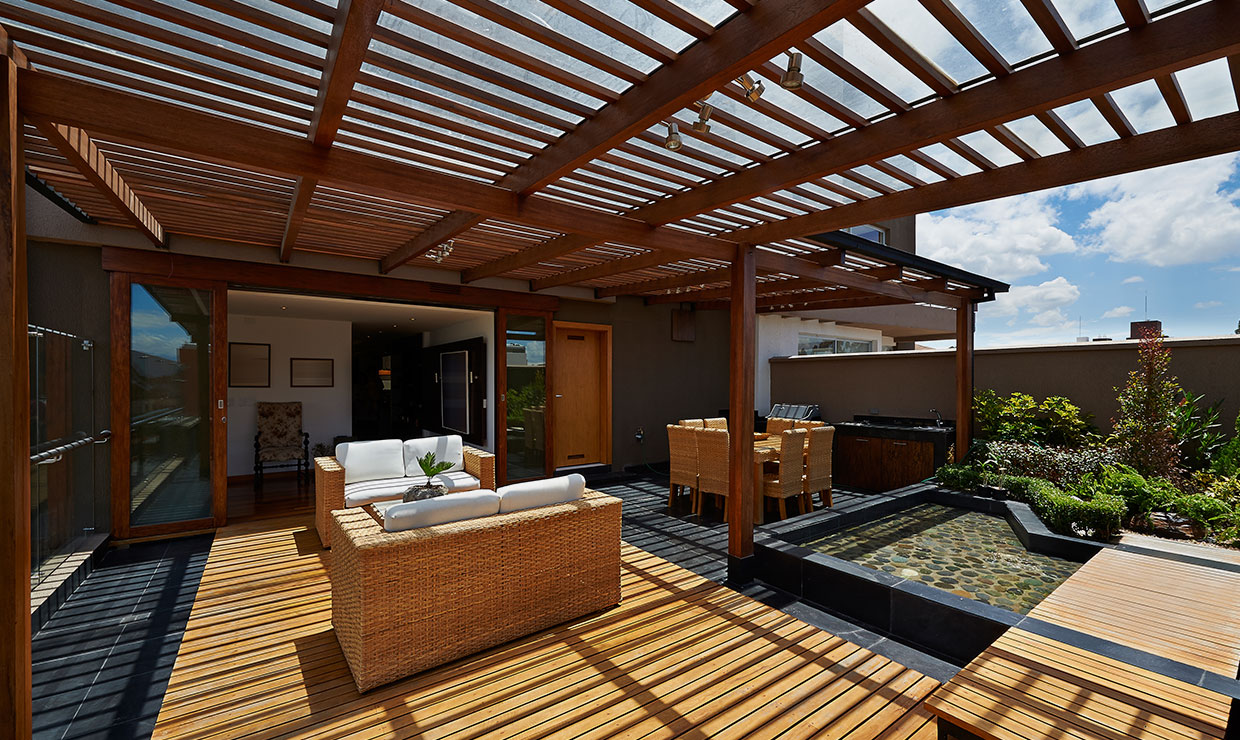
A well-designed porch can be the heart of your home’s outdoor space, offering a cozy retreat that is both functional and inviting throughout the year. Whether you’re planning a new porch installation or upgrading your existing one, creating a space that accommodates all seasons requires thoughtful planning and design. Here’s how you can transform your porch into a comfortable haven, no matter the weather.

1. Start with the Right Design

The foundation of a cozy, all-season porch lies in its design. Consider these elements when planning your porch installation:

  • Covered or Enclosed Space: A roof or enclosure protects the porch from rain, snow, and sun, making it usable year-round.
  • Durable Materials: Use weather-resistant materials like composite decking, treated wood, or brick for flooring and structure.
  • Proper Insulation: For enclosed porches, insulation and weatherproofing are essential to maintain a comfortable temperature.
  • Windows or Screens: Opt for retractable screens or large windows to enjoy fresh air in summer and keep out the cold in winter.

2. Create a Comfortable Seating Area

Comfortable seating is a must for a cozy porch. Choose furniture that suits both style and functionality:

  • Outdoor Sofas and Chairs: Look for weatherproof cushions and materials.
  • Rocking Chairs or Swings: Add charm and relaxation to your space.
  • Flexible Layout: Use lightweight furniture for easy rearrangement to suit different activities or seasons.

3. Layer with Textures and Accessories

Add warmth and personality to your porch with thoughtful décor:

  • Rugs: Outdoor rugs define the space and add comfort underfoot.
  • Throws and Pillows: Use soft, weather-resistant fabrics to provide cozy touches.
  • Curtains: Outdoor curtains can block wind, sun, or prying eyes, enhancing comfort and privacy.

4. Incorporate All-Season Elements

Designing for all seasons means thinking beyond summer evenings:

  • Heating Options: Install a patio heater, fire pit, or electric fireplace for warmth in colder months.
  • Ceiling Fans: Keep the porch cool during hot summer days.
  • Lighting: Use layered lighting, such as string lights, lanterns, and sconces, to create a warm and inviting atmosphere day or night.

5. Add Greenery for a Natural Touch

Plants bring life and vibrancy to your porch:

  • Potted Plants: Use a mix of seasonal flowers and evergreens.
  • Vertical Gardens: Save space with wall-mounted planters or trellises.
  • Herbs: Grow herbs in small pots for a functional and fragrant addition.

6. Seasonal Decor and Versatility

Switching up the decor keeps your porch fresh and engaging:

  • Spring: Bright flowers and pastel accessories.
  • Summer: Light fabrics, tropical plants, and outdoor games.
  • Fall: Cozy blankets, pumpkins, and earthy tones.
  • Winter: String lights, warm throws, and festive décor.

7. Consider Weather Protection

Protect your porch from the elements to ensure its longevity:

  • Awnings and Overhangs: Shield your porch from excessive sun and rain.
  • Roll-Up Shades: Provide flexibility to block sun or wind as needed.
  • Storm Doors: If enclosed, use storm doors to prevent drafts and maintain a comfortable temperature.

8. Entertainment Features

Make your porch a social hub with entertainment options:

  • Outdoor Speakers: Play your favorite tunes to set the mood.
  • Television: Add a weatherproof TV for movie nights or sports events.
  • Dining Area: Include a small table and chairs for al fresco meals.

A cozy porch for all seasons is a valuable extension of your living space, offering comfort, style, and versatility. By focusing on thoughtful design, quality materials, and personalized touches, you can create an outdoor retreat that your family and guests will enjoy year-round. Whether it’s a sunny summer day or a crisp winter evening, your porch can become a cherished space for relaxation and connection.

Read more

CONTACT US

(703)728-8544

abiliog@billydecksandpatiosllc.com

Mon – Sat: 8:00 AM – 5:00 PM

Back To Top
Call Now Button